In many gardens or yards, the ground is slanted, and when it rains, the soil gets washed away. This erosion not only harms plants but also renders the space more difficult to use and less attractive. Homeowners have perennial problems with holding soil in place and creating flat spots they can enjoy. A wooden retaining wall is a perfect solution to these problems.
Wooden retaining walls help reduce erosion, keep soil in place and create usable, level terrain that people can use as a planting bed or living space. It also enhances the appearance of any garden or yard. Wood, lighter and generally less expensive than concrete and stone, is easier to work with and allows design to take a naturalistic feel that complements an outdoor setting.
MEET THE EXPERT
- ■
Gary Barks delivers sustainable and durable wood retaining wall solutions across the USA.
- ■
Matthew Parrish provides custom retaining wall designs, DIY guidance, and educational resources to help homeowners build safe, code-compliant timber walls.
Design Inspiration & Planning
Before starting to build, remember to carefully think through the wood retaining wall design to avoid problems in the future.
 Style & Aesthetic Ideas
There are many different ways to construct a wood retaining wall based on the topography of the yard and personal preference. Some popular options include:
- Curved or Flowing Designs: These adhere to the natural lines of the yard rather than forming harsh angles. Curves can also help to soften the look of the wall by integrating it with the garden.
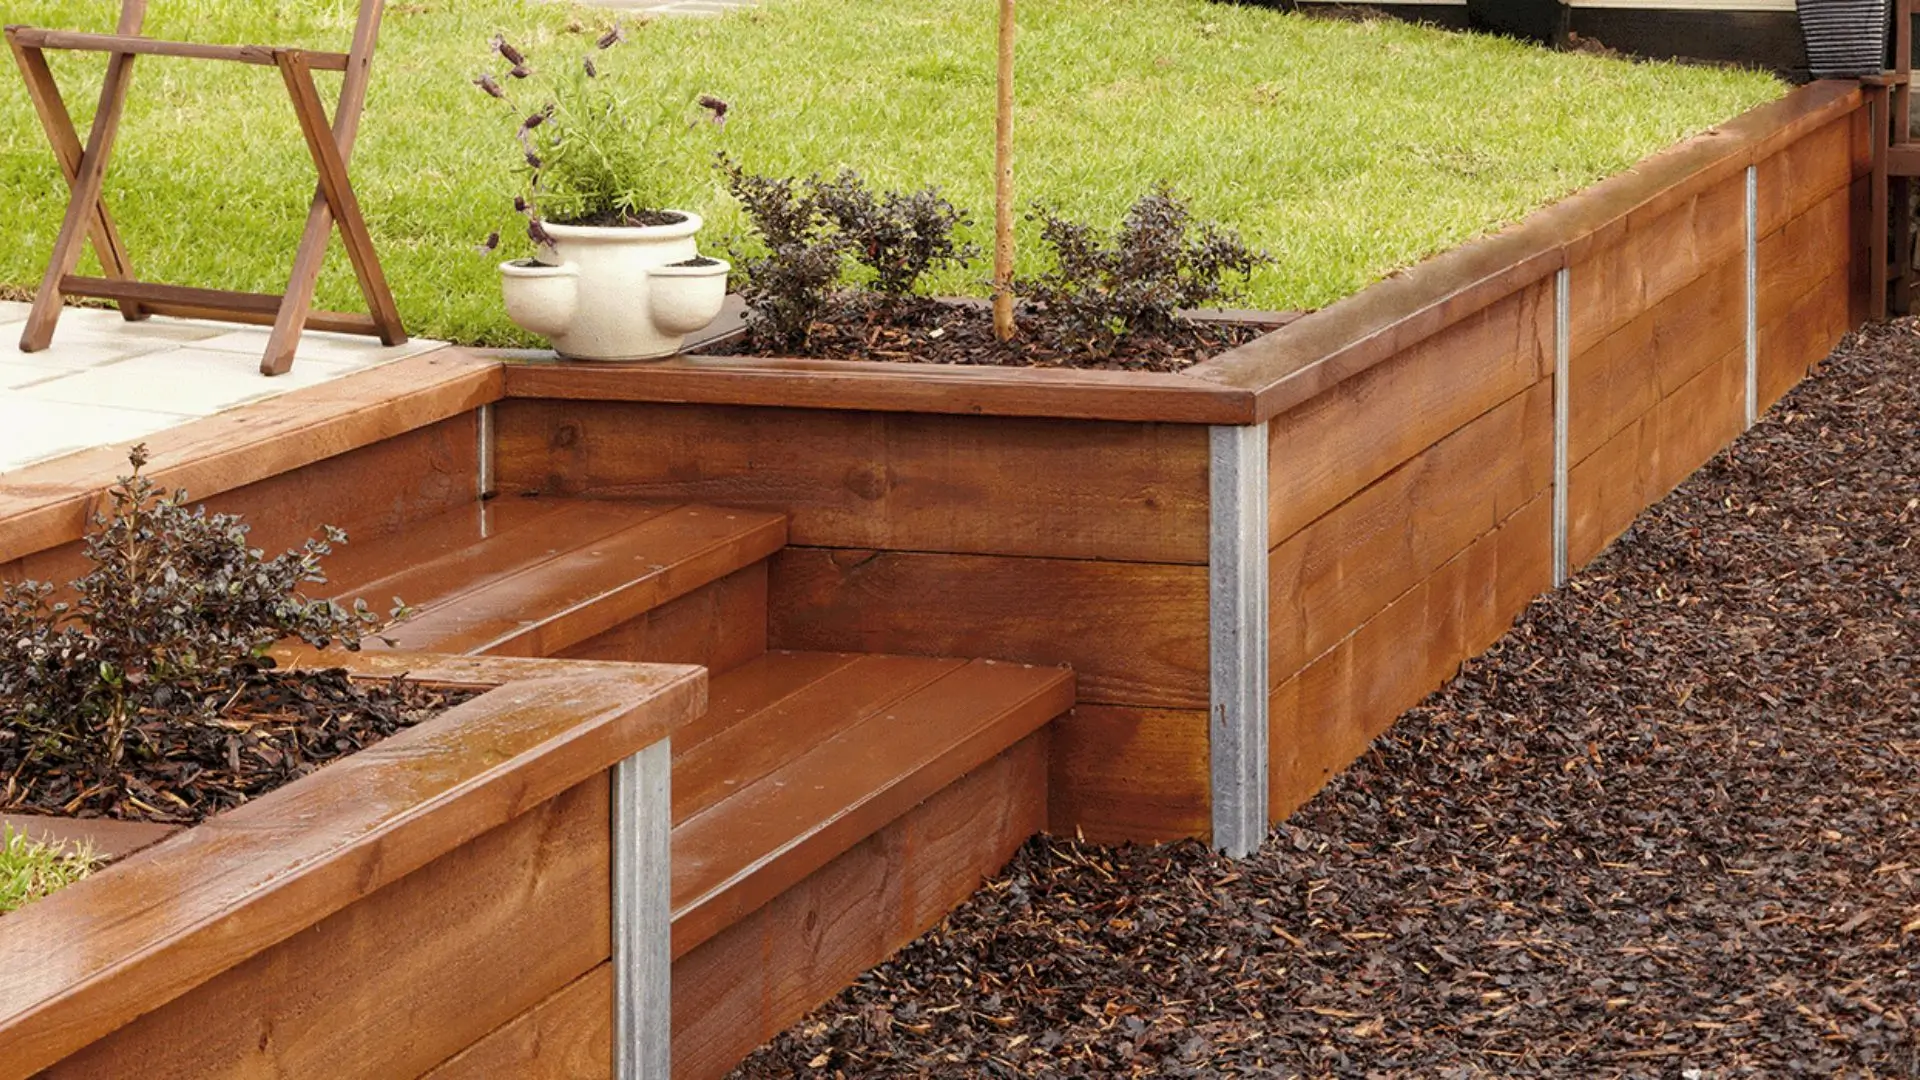
- Tiered or Multi-Layered Walls: Walls can be built in a tiered or multi-layered format, using smaller walls at different heights. The result is a succession of flat spaces that can accommodate flowers, shrubs, and even vegetables. It also makes the slope more manageable and attractive.
- Walls with Extra Features: Retaining walls can be a multifunctional feature in a garden. Homeowners often incorporate built-in seating, a fire pit or raised planting beds. These aspects serve not only to function as the wall, but rather as a focal point in the outdoor living space.
ℹ
Examples & Visual Appeal
Design is also about adding character and charm. Wood is flexible and can be styled in different ways to suit modern or traditional spaces. A few creative examples include:
- Black-Stained Wood: Dying the wood jet black gives a wall a masculine, modern look. It's perfect for contemporary homes and pairs well with sleek garden furniture.
- Cottage-Style or Wicker-like Walls: Woven wood walls offer a softer, traditional feel, especially when combined with plants that hang over the top, creating a warm, welcoming cottage vibe.
- Mixed Materials: Pairing wood with gravel, stones, or special finishes adds durability, weather protection, and extra visual interest.
Pre-Build Considerations
Prior to constructing a wood retaining wall, it should be properly planned. Since careful planning is necessary to prevent mistakes, keep the wall safe, and help it last for years, the following steps will be taken. Here are some of the things to consider before people start building.
1. Purpose & Height Limitations
A retaining wall is primarily employed to control soil erosion. A DIY wood retaining wall on a slope prevents the downcast flow of soil to lower areas of your yard. It also provides the opportunity to establish level areas for gardening or other outdoor spaces.
For safety, DIY walls should be no taller than 30 inches. The higher the wall, the more design and engineering it requires, because it has to support more pressure from the soil. Construction beyond this limit without specialist knowledge can cause cracking, leaning, or collapse.
2. Permits & Regulations
It may also be a good idea to consult local building codes before building. There can be rules in many cities or towns about retaining wall height, where they can be built, and even what materials can be used to build them. In some places, car-sized walls require a permit so that no one is killed by a falling wall. Failing to abide by these rules could mean finding oneself fined or asked to take the wall down. Looking into restrictions from the start can save time, money and aggravation.
3. Site Assessment & Drainage
A sturdy base and good drainage are the key to a strong wall. Inadequate preparation often leads to inferior walls that move, shift or rot prematurely. Key steps include:
- Pick the Right Season: Late spring or summer is generally a good time to start, because the ground, being drier, is easier to work.
- Clear the Site: Clear all plants, roots and debris from the site. Excavate into the slope to form the base for the first layer of timbers.
- Drainage Plan: One of the main reasons behind the failure of walls is water build-up. To prevent this:
- Backfill with drainage gravel to allow water to escape through.
- If necessary, put in a perforated drain pipe at the bottom.
- Install filter fabric to prevent soil from migrating into gravel and clogging the drainage system.
Materials & Tools Required
A wood retaining wall is a nice addition to the property to create a terraced area. Selecting a durable, weather-resistant wood is very important, as is investing in effective waterproofing materials for the wall.
Wood Selection
The selected wood type directly impacts the strength and life of the wall. People can’t use untreated lumber for a retaining wall because the wood will rot when exposed to soil and moisture. Instead, it is best to use:
- Pressure-Treated Pine or Fir: Rated for ground contact and is very resistant to moisture.
- Life Expectancy: On average, treated wood lasts about 10 years, but high-quality timber and preservatives can extend this up to 20 years.
- Extra Protection: Every time the wood is cut, the ends that are cut should be treated with a wood preservative. This helps to prevent premature rot and can add years to the life of the structure.
Complimentary Materials
In addition to wood, a few other materials are required to keep the wall strong and to keep it from rotting away with water damage:
- Gravel (¾″ Crushed Gravel): It is used as base and backfill material and is a good drainage source.
- Rebar (½″) or Strong-Tie Screws: Attach the first set of timbers to the ground so the wall doesn't shift.
- Filter Fabric: Fabric placed between soil and gravel to keep soil from passing into the drainage system.
- Drain Pipe: This perforated pipe resting behind the wall directs water from the structure so that it does not exert pressure on the wall.
ℹ
Tools Needed
The better the tools, the faster and more accurate the construction. People really need the following for most DIY projects:
- Shovel: For digging the trench and moving gravel.
- Post-Hole Digger or Auger: For creating deeper support holes.
- Level (Bubble or Laser): To check alignment and balance.
- Circular or Miter Saw: To cut timbers to size.
- Hammer or Impact Driver: For fastening screws or nails.
- Measuring Tape, String Line, and Stakes: To mark the wall layout.
- Heavy Machinery (Optional): For larger slopes where more earth needs to be moved.
Step-by-Step Construction Guide
Constructing a wood retaining wall is a great way to keep the topsoil from washing away down a slope.
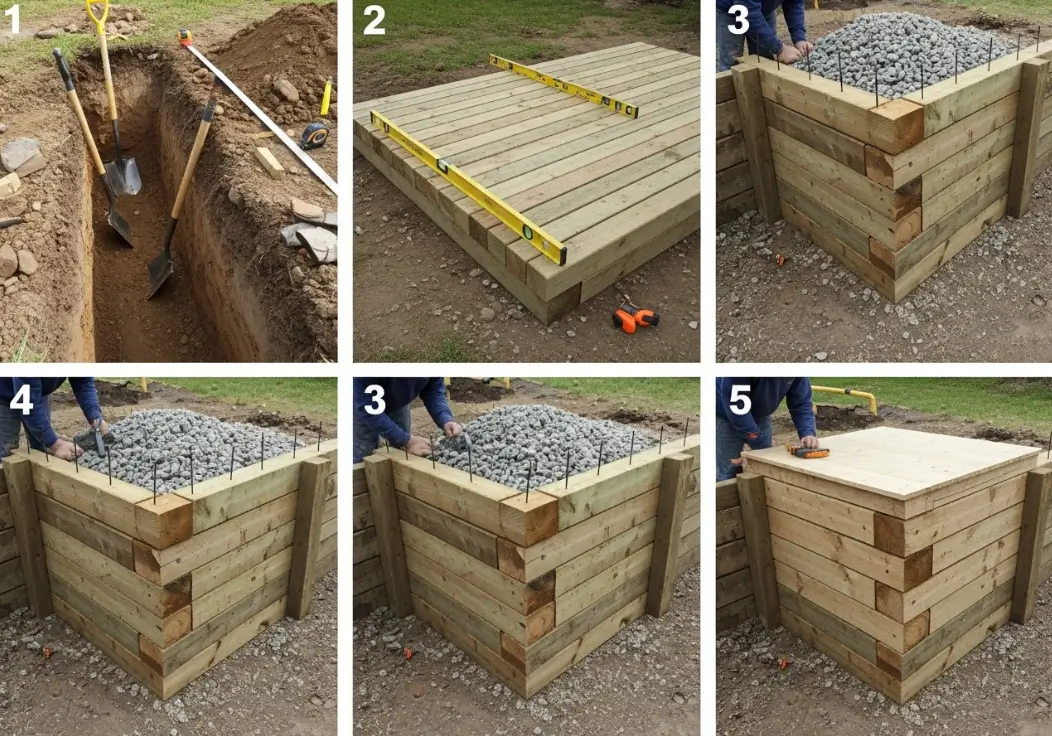
1. Site Layout & Excavation
The first step, then, is to sketch the shape and position of the wall. A clear layout ensures straight lines, smooth curves, and a stable foundation.
- Mark the Design Shape: Define the path of the wall with stakes and twine. This will help to visualize the project and make sure that the wall is following the right line.
- Dig the Trench: Carve out the slope and dig a trench for the footing. A width of 16 inches is advisable and a depth that allows the first timber to be buried at least one-third of its length. This backfilled base is what prevents the wall from moving toward the front.
2. Footing & Base Course
With the trench ready, the footing and base for a wall are similar to building the foundation. This section has to be flat and sturdy so that it does not lean over time.
- Add Crushed Gravel: Pour in 6 to 8 inches of 3/4 inch crushed gravel and compact it firmly. The gravel helps with drainage and prevents the wood from sitting directly on soil, which could cause faster decay.
- Check for Level: The surface should be level both front to back and side to side; check using a bubble or laser level.
- Place Filter Fabric (Optional): In areas with heavy soil, install filter fabric at the back of the trench to keep the soil from washing down and clogging the drainage system with it.
3. Anchoring & First Timber Layer
The timbers of the first course are also the central core of the wall. And with that well-placed, the rest of the structure will be easier to build and much stronger.
- Set the First Timber: Place the first timber in the gravel. Press it down hard so it sits flat.
- Secure With Rebar Or Screws: Drill holes and hammer rebar through the wood into the ground, or use strong-tie screws. This will help keep the base in place, even if some of the soil pushes against it.
- Ensure Level & Alignment: Verify that the lumber is level. Any tilt here will only get worse as the wall goes up and becomes wobbly.
4. Building Up The Wall
Now that the foundation is ensured, the remaining timbers can be stacked and attached to form the body of the structure.
- Stack Additional Timbers: Put the next course on top (with joints offset as in bricks, to add stability). This arrangement prevents weak points from aligning.
- Fasten Each Layer: Nail, screw or tie each timber to the one below it. (Strong ties prevent the wall from moving over time.
- Align Toward The Slope: Put boards so that they lean a little into the slope. This permits the soil pressure to bear timbers against the hill, instead of away from it.
5. Backfill & Drainage Setup
Drainage is the essence of longevity for a retaining wall. Without it, the water pressure can accumulate and push the wall outward.
- Backfill With Gravel: Position gravel behind the wall, stepping it up as you go. This layer permits the water to percolate through.
- Install A Drain Pipe: In areas with heavy rainfall or clay soil, lay a perforated drain pipe at the bottom of the backfill to carry water away.
- Add Soil Backfill: Once the gravel and drainage are installed, add backfill soil, compacting the soil in layers to avoid settling in the future.
6. Finish Work
The last step is to enhance the life and vibrancy of the wall.
- Trim And Treat Posts: Trim any posts or timbers to the correct height and use a preservative on any cut ends.
- Add Functional Features: Consider topping the wall with a planter, a small bench, or decorative trim to add both beauty and purpose.
- Landscape Around the Wall: Plant small ground covers, trailing vines or flowers in the cracks. This softens the architecture and integrates it with the natural garden.
Maintenance & Longevity
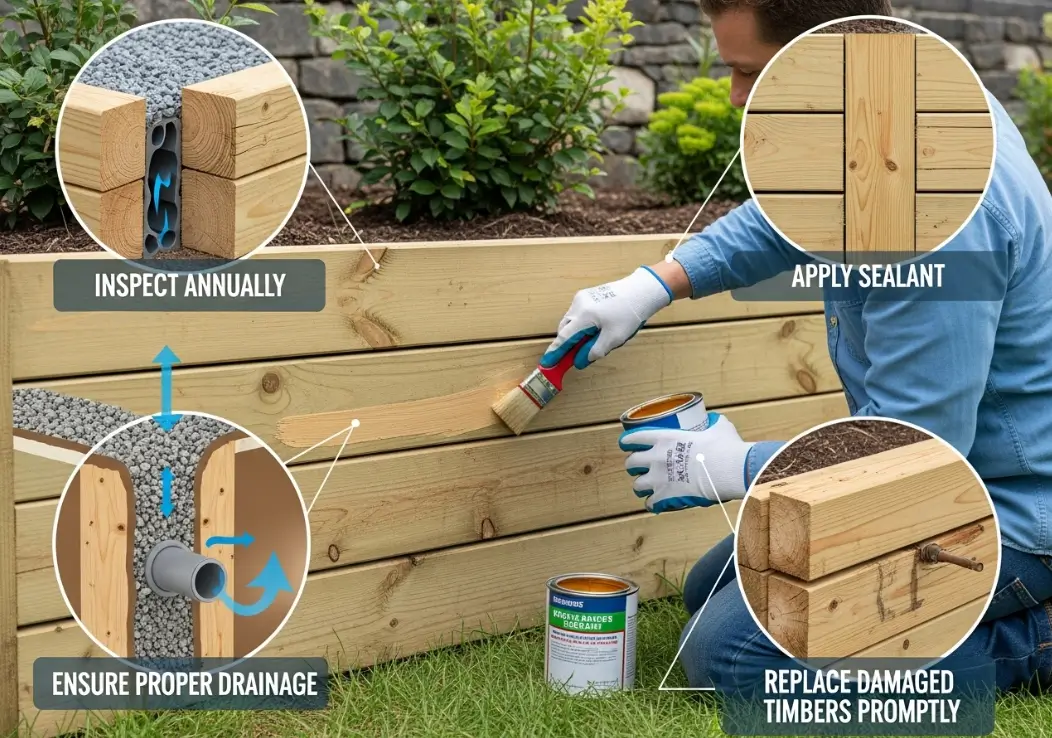
Timber retaining wall construction is both sturdy and functional, but just like anything else sitting in the outdoors, it requires some maintenance to keep it in good shape. The important thing is to protect the wood, control the flow of water and repair minor problems before they become major.
Expected Lifespan
The most common material for building retaining walls is pressure-treated pine or fir, although many other materials, such as concrete and various types of stone, are available as well. With good construction and handling, treatment and drainage, a usage life of 15-20 years or more can usually be obtained. The use of a wood preservative and sealing of any exposed cuts are two good ways to help prevent premature decay.
Maintenance Tips
Homeowners can do a few simple but essential things to maintain the wall’s strength and appearance over time:
- Inspect The Wall Regularly: Look for rot, slipping timbers, or any places where water is puddling. Early identification makes it possible to focus on small repairs rather than major rebuilding.
- Control Vegetation Near The Wall: Cut plants, bushes, or vines near the wall. Overhanging greenery can also cause wood to decay more rapidly from moisture buildup.
- Reapply Preservatives: Retreat all cut ends, joints, or exposed wood with a wood preservative. This prevents moisture from seeping into the wood.
- Maintain Drainage: Ensure that the drain pipes and gravel backfill are not blocked. If the water does not drain away, pressure will develop behind it and damage the structure.
Summary
A wooden retaining wall is an effective method of turning a flat yard into a beautiful, organized area. With a good design, the right timber and attention to construction details, a wood retaining wall will last many years and add value to the home. Consistent maintenance is what keeps the wall healthy and in good shape longer. Growcycle is a good source for wood retaining wall design ideas, outdoor tips, and how to guides to help get the most out of the outdoor projects.
Disclaimer: This material is for informational purposes only and should not be relied on for legal, medical, financial, or any other form of professional advice.


 Style & Aesthetic Ideas
