Welcome to the Largest Marketplace for Farming, Landscaping and Lawn Care

We unite suppliers and green industry professionals worldwide

How to repot a plant without damaging the roots: A step-by-step guide for success

How to repot a plant without damaging the roots: A step-by-step guide for success

06/03/2025
 

Many people have noticed that, over time, their houseplants become a bit cramped in their pots. The roots may escape through drainage holes, or the soil may dry out faster than it used to. All of these are indicators that it may be time to repot the plant. Repotting might feel like a big project, but it’s an important one for the health and well-being of the plant and its successful growth.

Repotting is necessary not only to give the plant more space to spread its wings, but to avoid issues like constricted roots or crappy soil. Fresh soil provides the plant with the nutrients it needs to produce the flowers the bees love, and a larger pot allows those roots, and hence the plant, to grow uninterrupted. "How to Repot a Plant" is a good opportunity to check for straggly or rotted roots and to freshen up the plant with fresh soil and new roots.

MEET THE EXPERT

  • Melinda Myers is a nationally recognized gardening expert, TV and radio host, author, columnist, and speaker. She also offers courses on The Great Courses: How to Grow Anything.
  • Elyssa Goins is a seasoned plant care expert who provides detailed guides on repotting houseplants, including when to repot indoor plants, selecting the right potting mix, and step-by-step instructions for transplanting houseplants.

Recognizing the Need to Repot

Recognizing the Need to Repot

It's essential to know when a plant needs to be repotted to keep it healthy. And plants frequently exhibit these subtle indicators of stress that convey that it’s time for a new approach and recognizing they can prevent growth headaches.

  • Roots Visible Through Drainage Holes: If people see roots coming out of the drainage holes at the bottom of the pot, it means the plant has outgrown its container. The roots are crowded and cannot extend properly to get water and nutrients.
  • Soil Dries Out Quickly: If the plant is drying out faster than normal, it’s a sign that the plant’s roots have pretty much filled most of the space within the pot, as there is not that much area for the soil to retain water.
  • Plant Growth Slows or Stops: If the growth isn't slowing or stagnant, it could be because the plant is rootbound. Since the roots are cramped in a tiny pot, the plant can’t get enough nutrients or water, and stunts its growth.
  • Top-Heavy Appearance: A top-heavy plant that becomes easily top-heavy may indicate the roots are not strong enough for the weight of the plant. This is usually due to roots being bound and unable to develop properly.
  • Soil Compaction or Mineral Buildup: As time goes on, the soil can become compacted in the pot, decreasing the soil’s ability to hold onto water and nutrients. Mineral buildup from fertilizers can also clog the soil and prevent root growth and soil health.

Timing for Repotting

The best time to repot a plant is when it’s actively growing, usually in spring or early summer. At this time, the plants are most likely to be able to rebound from the shock of repotting and initiate growth in the new pot.

Selecting the Right Pot and Soil

Selecting the right pot and the right soil are essential for successful repotting. The right pot leaves room for the plant’s roots to expand, and the correct soil allows the plant to get the nutrients it needs to flourish.

Selecting the Right Pot and Soil

1. Size

Make sure the new pot is 1-2 inches larger in diameter than the old one. A pot that’s too large might keep the plant’s roots sitting in too much soil, which could be holding excess moisture and potentially contributing to root rot. A container that’s too small will still restrict root growth and nutrient uptake, blocking the plant from reaching its full size. The perfect size allows room for the plants to grow and the drain hole between the drainage and the bottom of the planter is well designed.

2. Drainage Holes

The holes for drainage are one of the most important aspects of a pot of any type. These drainage holes are each made with slight angles outwards to allow excess water to escape and to avoid waterlogging that causes roots to suffocate and rot. With no proper drainage, the soil can become too saturated and overly wet, which can cause a number of problems for the plant, including root rot and fungal diseases.

3. Material

The pot material has a vital impact on the health of the plant. Terracotta pots are perfect for drought-resistant plants such as succulents and cacti. They have a slight porosity which promotes drainage, especially when there is too much moisture, thus preventing overwatering. For plants that like extra moisture, use pots that are plastic or glazed ceramic. These hold water and are a great option for plants that thrive when kept moist.

4. Quality and Drainage

Selecting a good-quality, well-draining potting mix is one of the most important aspects of repotting. The ideal medium is one that will let the water drain through so it doesn’t become swampy but retains enough moisture to keep the roots moist. There are specialized potting mixes for all manner of plant types. Every mix provides adequate moisture retention and drainage according to the particular requirements of the plant.

5. Avoid Garden Soil

Garden soil is never for repotting houseplants. It has a tendency to be really heavy and also too compact and doesn’t have drainage. Also, there might be pests, weeds, and diseases in the garden soil that adversely affect the plant. For containers, it is always best to use a specialty potting mix for container gardening because it’s sterile and formulated especially for potted plants.

Step-by-Step Repotting Guide

When a first time user repot a plant, it may seem quite a challenging process, but with the right accessories and the correct know-how, it’s actually very straightforward, and will help to achieve better results in growing healthy plants. Use this step-by-step repotting guide, which will help in repotting the plant without any damage to its roots.

Step-by-Step Repotting Guide

1. Preparation

Before embarking on the repotting project, collect the materials required. This makes sure the repotting process is as fast and efficient as possible:

  • Select a pot that is 1-2 inches bigger than the current one, so that the roots have room to grow. Make sure that the pot has holes in the bottom that will let any overflow drain out.
  • Choose a good, well-draining potting mix for the plant people are repotting.
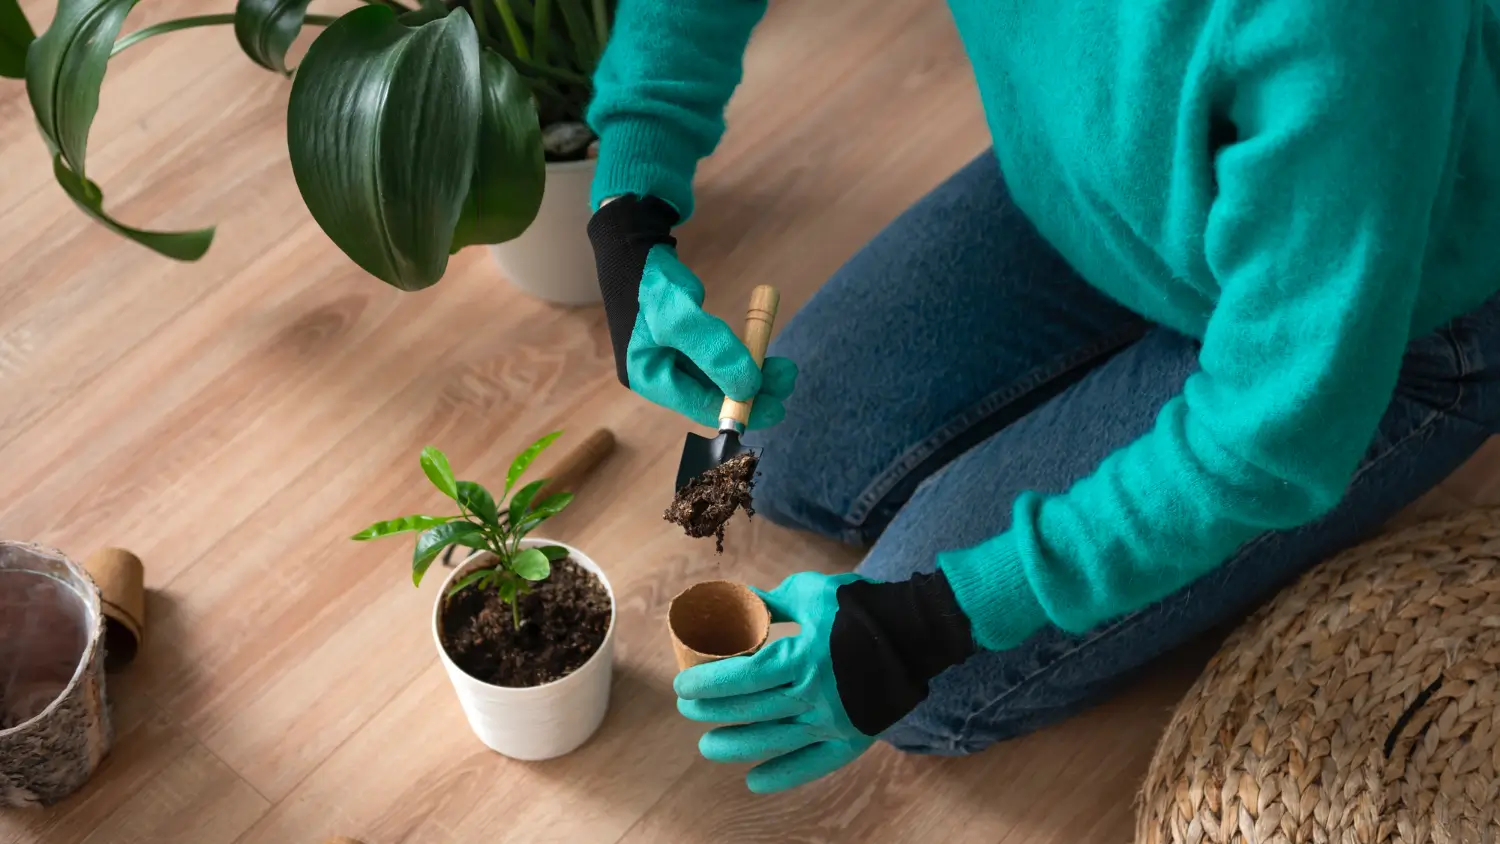
  • Gloves to shield the hands, particularly if the plant has tough thorns or the soil is polluted with chemicals.
  • Slightly loosen the dirt around the edges of the plant with a small trowel or spade and transplant to a new pot.
  • Special scissors or Pruning Shears are used to cut the damaged or overgrown roots.

Also, spread a plastic sheet, a newspaper or a gardening mat under the work area. This prevents soil from spilling and helps to keep the area clean, for easier cleanup following the procedure.

2. Removing the Plant

With the tools prepared, it’s time to remove the plant from its current pot:

  • Very gently remove the plant from its pot while securely holding the base of the plant near the soil. If the plant does not come out easily, tap the sides of the pot to loosen the soil. Do not rip the plant out by its stems or leaves as it may damage the plant.
  • If the plant is “root-bound” (meaning the roots have tangled and have made a big mass within the pot) gently break the plant away from the pot and tap the side of the pot. Gardeners can slit the pot, if necessary, to free the tree. When removed, gently free the root ball with fingers or a trowel. Try not to curve or break the roots while doing this.

3. Inspecting and Preparing the Roots

Once the plant is free of its old pot, it’s a good time to check over the roots and get them ready for the new pot:

  • Trim away any dead, rotting or damaged roots with a pair of scissors or the pruning shears. Healthy roots are lily white to light brown, with unhealthy ones looking brown, black, or mushy. By taking away dead roots, the roots won’t rot and they also redirect the plant to concentrate its resources on growing healthy roots instead.
  • If the plant is potbound, liberate the roots by untangling or trimming them for better growth. Farmers can carefully slice into the root ball in a few places to coax roots outward into the new soil. If the roots are extremely dense, feel free to trim off the most compacted parts. This will help the plant to spread its roots and get into the new pot.

4. Placing the Plant in the New Pot

Now that the plant and its roots have been prepped, it’s time to put it in the new pot:

  • Begin by putting a layer of fresh potting mix on the bottom of the new pot. This layer promotes drainage and supplies the plant with necessary nutrients for early growth. It should be thick enough to raise the plant to the proper height.
  • Position the plant in the center of the new pot with the soil level the same as it was originally. The top of the root ball should sit just below the lip of the pot, leaving space for watering. This will be important to keep the stem from burying, which will rot the plant.
  • Backfill around the root ball with new potting mix, tap soil lightly to remove air pockets. Avoid compacting the soil too much, which can block root growth and hinder water from getting through. And leave a little space (about an inch) from the top of the pot to allow for watering.

5. Watering

The plant should be watered immediately after repotting in order to aid new roots already in the pot to settle down amid their new growing medium:

  • When the plant is in its new pot securely, water it generously. This serves to firm the soil around the roots and removes the pockets of air. Give the plant a good soaking, leaving it in a sink to drain the excess water. This way, the entire root system gets a drink.
  • Allow the pot to drain out fully after watering. This is done to prevent waterlogging, which results in root rot. Don’t let the plant sit in standing water after watering. If the pot lacks a drainage tray, it’s best to set the plant on a surface that permits the free flow of water.

Aftercare and Troubleshooting

After repotting, it’s crucial to allow time for the plant to acclimate to its new conditions. Some plant care repotting tips can be beneficial in aiding the plant to recover from any transplant shock and support its growth.

Aftercare and Troubleshooting

Post-Repotting Care

  1. After repotting, put the plant in a spot with the exposure it requires. Give it the proper light like direct, indirect or low light. After potting, cutting, and repotting, do not put the plant into direct sunlight or an overly bright and hot location.
  2. Don’t fertilize the plant immediately after repotting. The best soil for repotting into the new pot will already be rich in nutrients, and fertilizing too soon can overtax roots. Avoid fertilizer for about 4-6 weeks to allow the roots to become accustomed to their new pot.
  3. Some transplant shock is to be expected after repotting and may show itself with drooping or yellowing leaves. This is usually temporary, but monitor the plant’s overall status. If the plant looks stressed, give it time and keep up the care. Usually, the plant recovers in a few weeks.

Common Issues and Solutions

  1. Wilting: If the plant begins to wilt, inspect the watering and drainage issues. Both overwatering and underwatering can also result in wilting. Make sure the pot is well drained and that the plant isn’t sitting in water. Also, be sure to inspect the soil’s moisture level to make sure it’s not too dry or too soggy.
  2. Yellowing Leaves: Quick yellow leaves can indicate too much light or too much water. Check the plant’s location, and make sure it’s getting the right amount of light. Plus, make sure they’re not being overwatered because that can cause root rot, which can result in yellow leaves.
  3. Stunted Growth: If the plant isn’t growing or appears to have stopped, it might be rootbound once again or the pot size might still be too small. Make sure the new pot is big enough to fit the roots. Inspect the roots and separate them if they appear to be tangled or overcrowded.

Special Considerations for Different Plant Types

Different plants have different needs when it comes to repotting. Understanding these needs ensures their health and growth.

Special Considerations for Different Plant Types

Succulents and Cacti

Succulents and cacti do best in a gritty, well-draining mix. Since these plants are used to hot, dry conditions, use soil that drains easily as this will help prevent rot due to overwatering. These plants don’t have to be repotted often. Repot only when the plant becomes too large for its pot. Commonly, this may be every 2-3 years or when the plant begins to become rootbound.

Tropical Plants

Tropicals like a moisture-retentive mix that is allowed to dry out a little but does not stay waterlogged. This helps them retain the humidity they need to stay healthy. To tropicals, new soil should be given new soil every 1-2 years. This serves to refresh the earth, gives the roots more room, and encourages growth.

Flowering Plants

For flowering plants, it’s best to repot after flowering. This will not break the blooming cycle, and the plant will be given time to recover. If selecting a new pot, make sure it is big enough to give the roots enough space to grow, but not too big. An oversized pot will encourage the plant to concentrate on growing its roots instead of flowers.

FAQs

How to repot a houseplant?
When repotting a houseplant, gently take it out of its existing pot, cut off any sick looking roots, and place it into a slightly larger pot with fresh, well-draining soil.

Should you untangle roots when repotting?
Yes, gently untangle roots or they will continue to spiral and eventually become rootbound.

Is it OK if roots break when repotting?
A few broken roots are to be expected when repotting, but do try to limit the damage. Snip any damaged roots to avoid decay and promote new growth.

The Bottom Line

When placing it in the best soil for repotting and the right pot as well as following the specific steps needed, the plants can have enough room to grow and flourish. After the repot, they need to sit in the correct light, the right amount of water and some time to adjust. If there have been any problems (wilting to yellow leaves), now is the time to investigate such issues as overwatering or poor drainage.

For those seeking additional guidance and resources on plant care, explore the Growcycle marketplace to get expert tips and tools for plant growth, making it easier to repot indoor plants that are healthy and thriving.

Disclaimer: This material is for informational purposes only and should not be relied on for legal, medical, financial, or any other form of professional advice.

About the Author

Victor Miller is an environmental journalist at Growcycle, specializing in sustainable agriculture. With a passion for storytelling, he highlights the latest trends, innovations, and practices that promote ecological balance and responsible farming.