Welcome to the Largest Marketplace for Farming, Landscaping and Lawn Care

We unite suppliers and green industry professionals worldwide

Planning a concrete slab? What to know before you pour

Planning a concrete slab? What to know before you pour

08/19/2025
10 minute read
 

Key Takeaways

  • Proper site preparation, thickness, and reinforcement are the foundation of a durable concrete slab.
  • The right mix and at least 7 days of curing are essential for strength and longevity.
  • Preventing cracks with joints, sealing, and early repairs saves time and money in the long run.

Concrete slabs are a major component of many construction projects. They can be seen just about anywhere in driveways, on patios, garage floors, in workshops and even in the foundation of many homes. They’re frequently overlooked as people see them as unremarkable, but a concrete slab does a lot in making sure a surface is flat, solid, and resistant to wear.

Without proper planning, they can crack, sink or wear out far earlier than anticipated. This generally occurs as a result of bad preparation, wrong thickness, or a cure time not being followed for the slab. This article outlines how to prepare the ground before pouring a concrete slab.

MEET THE EXPERT

  • Bruce Conway is a seasoned concrete repair specialist and provides expert solutions for slab maintenance and repair across residential, commercial, and municipal projects.
  • Peter Craig is a nationally recognized concrete floor specialist and is known for his technical guidance and practical solutions in slab construction and repair.

1. Understand Concrete Slabs and Their Types

Concrete slabs are flat, horizontal surfaces made from concrete that are used to provide a strong surface or a strong foundation for many types of construction. They are one of the most commonly used construction materials as they are low-cost but add high value in terms of strength and stability.

There are two main types of slabs:

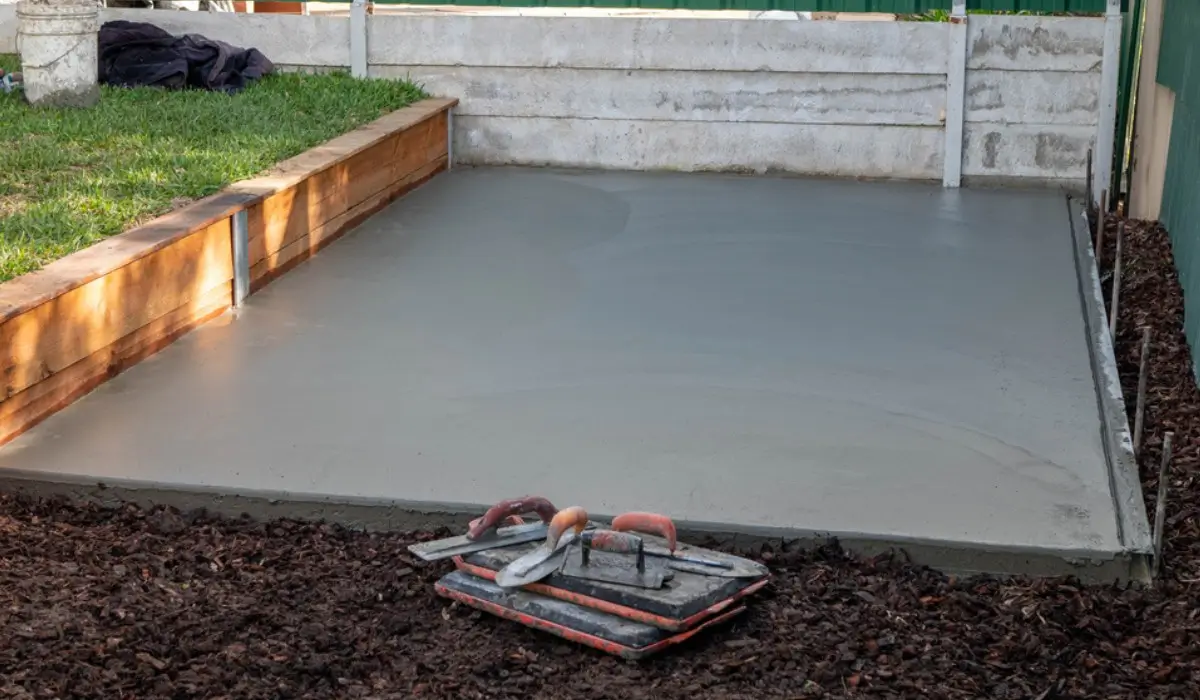
  1. Ground-bearing slabs (slab-on-grade): These are placed immediately over the prepared ground or prepared base layer. They are the most popular type, typically used for house foundations, driveways, patios, garages and garden sheds
  2. Suspended slabs: These are not in contact with the ground; rather, they are supported by beams, columns, and walls. They are normally encountered in multi-storey car parks, parking garages, as well as in any other special industrial application, wherever the floors must allow a higher loading beyond ground level.

Functions and Common Uses

  • Offers a flat, level surface for living spaces, patios, walkways, garden, and garage bases.
  • Evenly distributes weight to prevent sinking or shifting.
  • Creates a flexible, accessible surface able to accommodate heavy loads and traffic depending on thickness.

2. Pre-Pour Planning & Site Preparation

A lot of planning and preparation go into the site before any concrete is poured. A site that is properly prepared provides a slab with the sturdy base it needs in order to work for several years.

Understand Concrete Slabs and Their Types

  • Permits, Utilities, and Codes: The first thing to do is to look up the local building regulations. Slab thickness, depth and drainage are subject to rules in most areas, and official permits may be required in some jurisdictions before work can start. All underground utility lines, including water, gas and electricity, must be marked before any digging.
  • Site Layout: It is important to properly measure and sketch up the slab to size and shape. Straight edges and square corners will make construction easier and the finished product will look more professional. Drainage should also be evaluated at this point.
  • Excavation and Subgrade: The top layer and organic content must be excavated due to their low bearing capacity for concrete. Excavation proceeds to the necessary depth for the gravel base as well as for the slab. Next, add a layer of gravel or crushed stone (2 to 4 inches thick).
  • Compaction and Stability: Once the foundation is in place, one must compact the soil in layers. This is important because loose soil or gravel will settle unevenly over time and cause cracks in the slab. Frequently, a vibratory compactor or a vibrating plate is used to ensure a solid, stable surface.
  • Moisture/Vapor Barrier: A vapor barrier is then laid to keep the slab from drawing moisture from the ground. Most often, this is a heavy plastic sheet laid over the compacted base. Most are at least 6 mil thick, but 15 mil or more is the preferred minimum for longevity.
  • Formwork / Framing: The last step before pouring is to construct the forms. These are temporary frames, typically made of wood or metal, that hold the wet concrete in place until it hardens. Well-defined, level forms are necessary to hold the slab square and true. They should be smooth inside and free from protrusions, which can interfere with finishing.

3. Choose the Right Thickness & Reinforcement

When deciding on a concrete slab for the new project, one of the first decisions that comes about is determining how thick it should be and whether or not the user will need to reinforce it. The thickness and reinforcement work together to provide the necessary strength and durability to the slab for its intended use.

Choose the Right Thickness & Reinforcement

Standard Thickness

The standard thickness is 4 inches of slab for most light-duty use, like patios, walkways and floors with no vehicles on a well-compacted, stable soil. This thickness offers the right amount of durability for everyday foot traffic, light furniture and even the occasional small things dragged across the room without any rips or tears, or shifting of the panels.

When Thicker is Needed

If the slabs are exposed to heavy use or have poor soil conditions, people need extra thickness. 6–8 inches is recommended for:

  • Driveways carrying vehicles
  • Garage floors
  • Workshops or areas with a machine

Thickened edges or turndown beams can be added at the periphery for stability. These deeper edges serve as little footings that help prevent edge cracking and provide stability.

Joint Spacing Relative to Thickness

Concrete, as it cures, naturally shrinks and can crack. Control joints are deliberate cuts that direct cracking in a prescribed direction.

  • For a 4-inch slab → joints every 4–6 feet
  • For a 6-inch slab → joints every 6–8 feet
  • Joint depth → about one-quarter of the slab’s thickness

This space is ideal for avoiding random cracks and keeping the slab looking consistent.

Reinforcement

Thickness provides compressive strength, and reinforcement improves crack resistance and tensile strength. Two of the most popular types of reinforcement are these:

  • Wire mesh is commonly used in thinner slabs to limit surface cracking.
  • Rebar is best for thicker or larger slabs that will bear more weight, as it holds the concrete together during soil or load shifts.

Reinforcement should be at mid depth not at the bottom of the slab. If the water table is so low that it's going to collapse during the pour, it won't be able to fulfill its role in stopping the formation of cracks.

4. Cost Considerations

A slab of concrete is more than just a pile of cement. There are a few expenses, so if people plan for all of them, it can help the project stay on budget. The primary categories to evaluate are materials, labor and tools, as well as reinforcement and curing supplies (or whether to hire professionals or do it yourself).

Material Costs

Concrete is priced per cubic yard. To determine the concrete slab cost per square foot:

  • Measure length × width × depth (in feet).
  • Multiply to get cubic feet.
  • Divide by 27 to convert to cubic yards.

Order enough to be a little more than the calculated amount to allow for spills and uneven ground.

Labor and Tools

Even DIY has labor-related costs especially for tools. Common expenses include:

  • Excavation tools or machinery for soil removal.
  • Compaction equipment (e.g., plate compactor or Wacker machine).
  • Formwork materials like wood or metal boards.
  • Finishing tools such as screeds, bull floats, and trowels.
  • Extra helpers for larger pours, which may add labor costs.

Reinforcement and Curing Supplies

Reinforcement and curing products are also necessary for a correct slab. Steel rebar or wire mesh should be in the budget, as it will make the slab stronger and keep it from cracking. The slab itself is usually covered with a vapor retarder such as a heavy plastic sheet. After casting, curing compounds, sealers, or curing covers may be required to prevent drying and improve strength.

5. Pouring & Finishing

After the site preparation and procurement of materials, pouring and finishing are the most critical parts of the process. How the concrete is placed, leveled and cured will determine how strong, durable and nice-looking the slab will be.

Pouring & Finishing

Timing & Weather Considerations

Concrete reacts strongly to weather. The problem with a too slow curing time for concrete slab is serious:

  • Hot weather: The concrete dries too fast, resulting in surface cracks and lower strength. Shade the site, moisten the surface, or use cold water in the mix.
  • Cold weather: Concrete may take too long to cure or freeze before hardening. Insulate with blankets, apply heaters and add accelerators to the mix.

Concrete does best if poured in constant, mild temperatures.

Concrete Mix Quality

The mix quality affects the long-term strength of the slab.

  • Do not add extra water just to get it to spread more easily. Excess water reduces density and thereby weakens the slab.
  • Rather, utilize admixtures or plasticizers to enhance workability without compromising strength.
  • Maintain a reasonable water-to-cement ratio for a long-lasting surface.

Pouring & Leveling

Concrete should be poured separately and leveled to produce smooth, level surfaces. The basic sequence includes:

  • Fill the formwork gradually and as uniformly as possible, spreading the concrete to prevent segregation.
  • Level the surface with a screed board, scraping away the excess.
  • Work over with bull float to even out and push larger aggregate down.
  • After the mix begins to stiffen, use trowels for the finish.
    • A smooth trowel finish works well for indoor areas.
    • A broom finish provides slip resistance for outdoor slabs like driveways and patios.

Joints Installation

Concrete naturally shrinks when it cures, so control joints are needed to stop it from cracking in random spots. These joints are saw-cut or tooled in the slab shortly after the surface has stiffened, but before the concrete is fully hardened. The general rule is that joints should be cut to a quarter of the thickness of the slab. The spacing is also important as closer joints are required for thin slabs.

6. Curing Strategies

When concrete dries too fast, it shrinks and cracks. Curing slows this process, which helps the chemical reaction taking place inside the concrete (a reaction called hydration) proceed at a more even pace. The end result is a stronger, more durable, surface resistant slab that is less prone to surface problems like dusting, scaling, or early cracking.

Curing Strategies

Curing Techniques

There are a number of ways to cure a slab properly, but all involve holding concrete moisture during its formative days.

  • Spraying water: Periodically misting the surface will keep it moist and prevent quick drying.
  • Covering with burlap or blankets: Materials soaked with water and laid out on the slab can help retain moisture while shading from direct sunlight.
  • Plastic sheeting: A sheet of plastic keeps moisture inside the slab so it can’t evaporate.
  • Curing compounds: These compounds, which are sprayed or rolled on, create a waterproof membrane that seals the water in.

The slab should be adequately moist for a minimum of seven days to achieve adequate strength in most cases.

DIY Curing Tips

Simple methods can be effective for small projects. The slab can be covered with wet blankets or towels as soon as it has set to the point where it will bear a cover. They should be maintained as wet as possible. Another simple approach is to mist the surface each day with a garden hose, making sure the concrete never dries too rapidly.

Temperature Control During Curing

The weather has a lot to do with how curing should be approached. In hot weather, shade the slab or lightly dampen the surface to retard drying. In winter, it is insulated with straw mats or thermal blankets to prevent the concrete from freezing, which would permanently damage it. 

7. Crack Prevention & Common Mistakes

Concrete shrinks by nature as it sets, and this shrinkage commonly leads to cracked concrete. Other factors include uneven settling underneath the slab, temperature or moisture changes that cause the concrete to expand and contract, or the force of heavy objects on weak spots. If these things are missed in planning, cracks will most likely show up sooner or later.

Controlled Cracking vs Random Cracks

Concrete will inevitably crack, but control joints ensure it cracks in the right places. This is achieved by saw cutting or forming control joints in the slab. These joints make weak lines where cracks can occur easily and predictably, rather than just anywhere across the surface.

For instance, a 4-inch slab may need a joint after every 4 to 6 feet. Through planned joint location, cracks can be directed so the strength and appearance of the slab are maintained.

Avoid These Errors

Here are a few common mistakes that can lead to cracking:

  • Poor subgrade preparation: When the subbase is loose or soft, it leads to uneven settlement under the slab.
  • Insufficient compaction: The slab is likely to move and crack if there’s not a strong foundation.
  • Inadequate reinforcement: Cracks tend to become much wider in the absence of rebar or wire mesh.
  • Excess water in the mix: An excess of water can water down the strength of the concrete and increase the chance of cracking.
  • Missing vapor barrier: Moisture coming up through the ground can lead to the slab being soft and slow curing.
  • Skipping curing steps: Drying too soon will almost automatically lead to surface cracks in the slab.

Maintenance Tips

In fact, even well-constructed slabs can end up with small cracks. Good maintenance can help prevent them from getting worse.

  • Cover the slab with a concrete sealant to prevent water infiltration.
  • Check for new cracks or surface damage regularly.
  • Repair early with a concrete patch or sealant by filling in small crevices.
  • Reapply every couple of years to maintain protection.

Summary

Concrete slabs might seem like just another building material, but they are also an essential component of many homes and outdoor living spaces. Their longevity and strength are contingent on good planning and careful work. With the correct technique, the concrete slab thickness for the patio will be durable and long standing for several decades, whether it is used for a patio, driveway, garage floors, or slab foundation guide. Growcycle marketplace has useful guides and industry insights for people looking to learn more about construction, building materials and practical tips for the projects.

Disclaimer: This material is for informational purposes only and should not be relied on for legal, medical, financial, or any other form of professional advice.

FAQ

What do I need to do before pouring a concrete slab?

Prepare the site for the pour by digging out and removing topsoil, compacting the base, and adding a layer of gravel. Install a vapor barrier, build solid forms and consult local codes or permits.

What is the 4-2-1 rule for concrete?

The 4-2-1 rule refers to a basic concrete mix ratio: 4 parts gravel, 2 parts sand, and 1 part cement. This blend of strengths will be ideal for the variety of projects a typical contractor would be involved with.

How to pour a concrete slab?

Once the base and forms are in place, evenly pour in the concrete, level it off with a screed, smooth out the surface with a float, and finish with a trowel. Cut the control joints early and cure the slab with constant moisture.

Do you need rebar for a 10x10 concrete slab?

For a small 10x10 slab, rebar may not be needed if the slab is less than 4 inches thick and is not used for heavy loads. But strength goes up further if you add wire mesh or rebar and that helps avoid cracking, especially on softer soils.

About the Author

Victor Miller

Victor Miller X

Environmental Journalist Focused on Sustainable Agriculture

Victor Miller is an environmental journalist at Growcycle, where he covers the latest news, trends, and innovations in sustainable agriculture. He has a deep passion for storytelling that emphasizes ecological balance and responsible farming practices. Before joining Growcycle, Victor worked for several agricultural and environmental publications, reporting on significant environmental issues and interviewing key figures in the sustainability sector. His work has been featured in various industry journals and online platforms. Victor holds a bachelor's degree in environmental science, with minors in journalism and ecology. His education, coupled with practical experience, has made him a trusted voice in the agricultural journalism community.