August 24, 2025

Growing plants is a great way to connect with nature and make outdoor spaces more beautiful. Adding flowers like Shasta daisies to a garden can bring brightness and joy. These flowers, with their white petals and yellow centers, are popular for many gardeners because they are easy to grow and add a cheerful touch to any landscape.
Shasta daisies are a garden favorite because they bloom for a long time and attract helpful pollinators like bees and butterflies. Their bright and happy look can change the feel of any garden. This guide will help gardeners understand how to grow them successfully and enjoy their beauty throughout the year.
Growcycle offers expert advice on what type of soil Shasta daisies need and which fertilizers are best for promoting healthy growth. It also helps gardeners avoid common soil issues affecting the daisies’ blooming potential.
The Shasta daisy (Leucanthemum × superbum) is a hybrid flower with a fascinating history. First introduced in the early 20th century, it has since become a favorite in gardens worldwide due to its cheerful appearance and easy care.
American horticulturist Luther Burbank created the Shasta daisy in the 1900s. Burbank was known for his work in plant breeding and was particularly interested in creating new, hardier varieties of flowers. To develop the Shasta daisy, Burbank crossed several different types of daisies, including the English daisy (Bellis perennis), the oxeye daisy (Leucanthemum vulgare), and a few other wild daisy species.
This hybridization aimed to create a larger, more vibrant daisy that could thrive in a wider range of climates and soil conditions. The result was the Shasta daisy, with its large, white petals and bright yellow centers. Over the years, this plant has been further developed, with new cultivars offering different sizes, colors, and bloom shapes. However, it remains true to its origins as a hardy, long-blooming perennial that brings joy to gardens and landscapes worldwide.
The Shasta daisy is a perennial plant known for its striking, classic daisy appearance. Here is a detailed botanical description of this beloved flower:
The Shasta daisy typically grows to a height of 18 to 36 inches (45 to 90 cm), though some varieties can reach up to 4 feet (1.2 meters). Its upright, clumping growth habit forms dense, bushy mounds with multiple stems rising from the base.
The leaves are lance-shaped or elliptical, rough in texture, and dark green in color. They grow in a basal rosette at the base of the plant and are arranged alternately along the stems. The leaves can reach up to 6 inches (15 cm) in length and have slightly toothed edges.
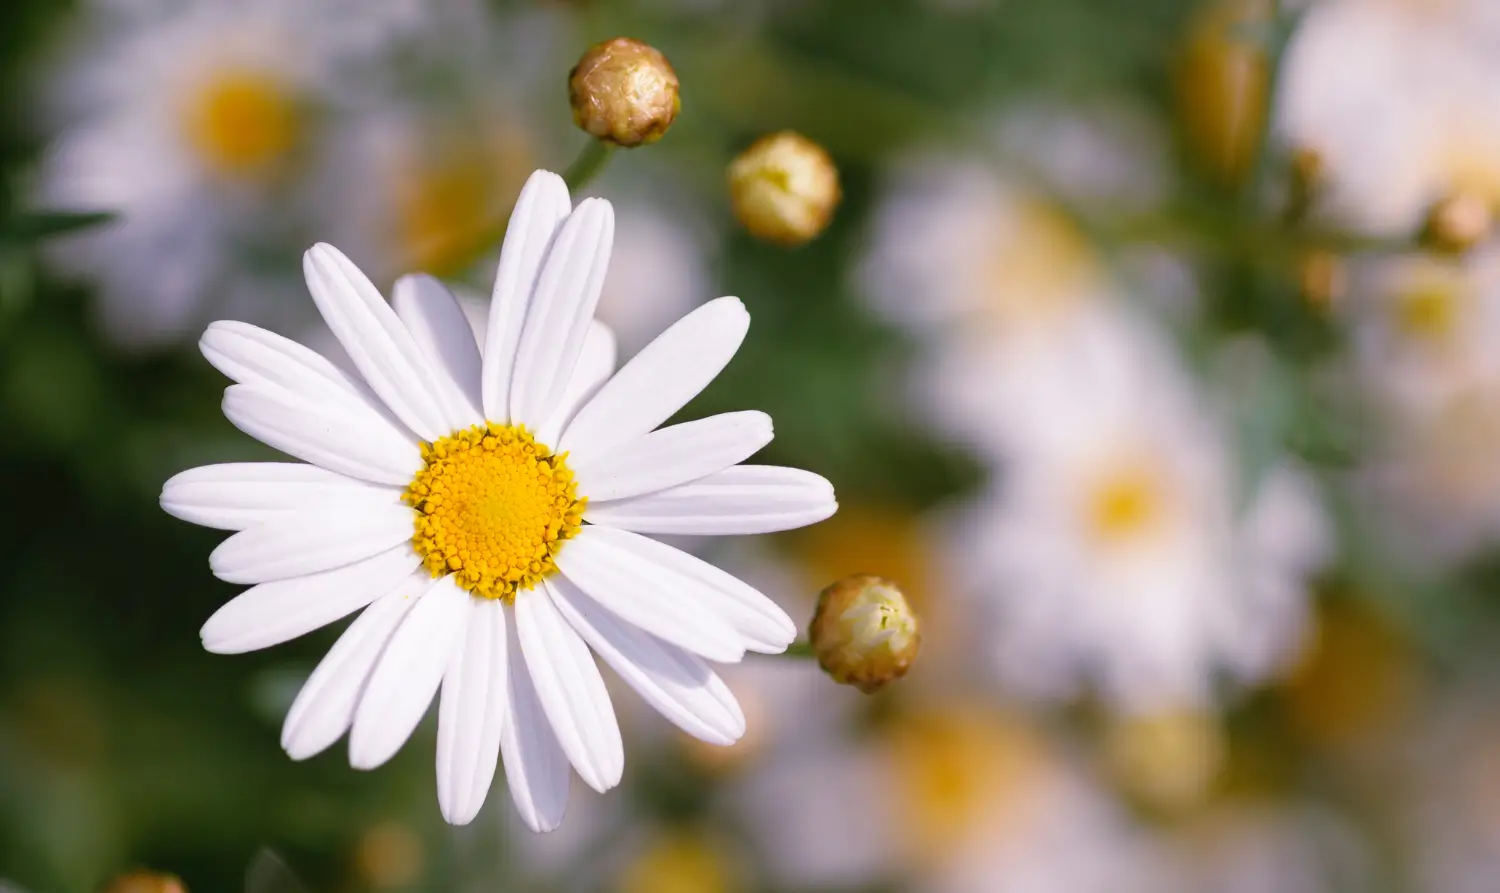
The Shasta daisy's flowers are the most distinctive feature. Each flower has a central yellow disk surrounded by white, petal-like rays. The individual blooms are around 2 to 4 inches (5 to 10 cm) in diameter.
The blooms appear daisy-like, with 15 to 30 white petals (or "ligules") that radiate from the yellow center. Flowering typically occurs in late spring to early summer, and each flower can last for several weeks.
The stems of the Shasta daisy are slender, strong, and typically hollow, with no noticeable branching. They hold the flowers high above the foliage and are covered in fine hairs. The flower stalks are usually unbranched but can have several blooms along the top.
The Shasta daisy has a fibrous root system that spreads out from the base of the plant, allowing it to establish itself in the soil and support its upright growth. It also produces rhizomes, which help the plant spread and form new plants.
As a hybrid, the Shasta daisy typically features white petals with a bright yellow center, though some cultivars may have slight variations in color or flower form. The flowers are daisy-like in shape, making them easily recognizable in any garden.
After blooming, the Shasta daisy produces small, elongated seeds within the center of the flower. These seeds are dispersed by wind and can be collected for propagation. The seed heads are often a fluffy, downy structure that resembles a dandelion puff when mature.
Shasta daisies are a fantastic addition to any garden due to their numerous benefits. From their aesthetic appeal to their environmental advantages, here are several reasons why gardeners love growing Shasta daisies:
Growing Shasta daisies successfully begins with choosing the right location and preparing the soil. Here is how to ensure optimal growing conditions for these beautiful flowers:
Shasta daisies thrive in full sun, needing at least 6 hours of sunlight daily to bloom profusely. Full sun encourages strong, healthy growth and increases the flower's vibrant white petals and yellow center. While they prefer full sun, partial shade can still support growth, especially in areas with very hot summers. In these cases, providing afternoon shade can help prevent the plant from becoming stressed due to excessive heat. However, reduced sunlight may lead to fewer blooms.
Shasta daisies are hardy in USDA zones 4 to 9, making them suitable for a wide range of climates, from cooler northern regions to warmer southern areas. They prefer temperate climates and can withstand mild winters, but a layer of mulch can protect the roots from freezing temperatures in areas with harsh winters. In warmer climates, they will do best in areas with some afternoon shade to avoid scorching heat.
Shasta daisies require well-draining soil to prevent waterlogging, which can lead to root rot. Soil that retains moisture without becoming soggy is ideal. The pH level of the soil should be slightly acidic to neutral, ideally between 6.0 and 7.0. Soil that is too acidic or too alkaline may affect the plant’s ability to take up nutrients and may result in poor growth or yellowing of leaves.
Organic matter such as compost or well-rotted manure should be added to improve soil structure, improve moisture retention, and provide essential nutrients. Compost helps balance soil pH and promotes healthy microbial activity, which benefits plant growth.
Select a sunny spot that receives plenty of direct light to get the most blooms. The more sunlight the plant receives, the better its blooming potential. Shasta daisies do best in well-drained locations that prevent standing water, which can cause root rot and other issues. Avoid low-lying areas where water tends to collect.
These plants are relatively disease-resistant, but proper spacing (about 12 to 18 inches apart) and air circulation are crucial to prevent fungal diseases like powdery mildew. Additionally, choosing a location that avoids heavy foot traffic helps protect the plants from damage and stress, allowing them to grow vigorously and resist disease.
The best time to plant Shasta daisies is in spring. Plant them early in the spring to grow and bloom during the warmer months. Fall planting is also possible, especially in areas with mild winters. If planting in the fall, it’s important to do it early enough to let the plants settle before the cold weather arrives. It is best to avoid planting when the soil is too wet or frozen, as this can affect how well the plants grow.
Transplants are often preferred for quicker blooms, while seeds can be a more cost-effective, long-term option for growing Shasta daisies. Here is a step-by-step guide to grow this beautiful plant:
1. Planting from Seeds
2. Planting Transplants
Proper spacing is crucial to the health of Shasta daisies. The plants need enough room for their roots to spread and for air to circulate between them. Space Shasta daisies are about 12 to 18 inches (30 to 45 cm) apart for smaller varieties or up to 24 inches (60 cm) apart for larger varieties. This allows the plants to grow without overcrowding and helps reduce the risk of disease due to poor air circulation.
Proper care and maintenance are essential for keeping Shasta daisies healthy and vibrant. Here is how to ensure they thrive throughout the growing season:
Shasta daisies prefer moderate watering. They need enough water to keep the soil moist but not waterlogged. Water the plants deeply to encourage root growth, but allow the top inch of soil to dry out between waterings. Avoid frequent shallow watering, as it can lead to weak root systems.
Shasta daisies generally don’t require heavy fertilization. A balanced fertilizer with equal amounts of nitrogen, phosphorus, and potassium (e.g., 10-10-10) promotes healthy growth and vibrant blooms. If the soil lacks nutrients, apply fertilizer in early spring when new growth begins and again in mid-summer if necessary.
Mulching is an effective way to keep soil moist, regulate temperature, and suppress weeds. A layer of mulch around the base of the Shasta daisies helps retain moisture during hot weather and prevents the soil from drying out too quickly. Mulch also helps to insulate the plant’s roots during cooler months, preventing extreme temperature fluctuations.
Deadheading involves removing spent flowers from the plant. This encourages the plant to produce more blooms and extends the blooming period throughout the summer. Simply cut or pinch off faded flowers just above the leaf nodes to keep the plant looking tidy and to promote additional flower production.
Shasta daisies are generally resistant to pests and diseases but may occasionally face issues like aphids, Japanese beetles, powdery mildew, and root rot. Aphids can be controlled with insecticidal soap or by introducing natural predators like ladybugs, while Japanese beetles can be managed by hand-picking or using organic traps.
For diseases, improving air circulation, watering at the base, and using fungicides can help control powdery mildew. To prevent root rot, ensure the soil drains well and avoid overwatering. Regularly check plants for pests and diseases and remove any infected parts to stop them from spreading.
Shasta daisies are a beautiful and low-maintenance addition to any garden, offering bright, cheerful blooms that attract pollinators and bring joy to outdoor spaces. Their easy care, long blooming period, and hardiness make them a favorite among gardeners of all levels.
Whether planted in borders, mixed beds, or as part of a wildflower garden, Shasta daisies bring a timeless charm that will brighten any landscape. Visit Growcycle to learn more section about the growing and harvesting methods of perennial plants.
Disclaimer: This material is for informational purposes only and should not be relied on for legal, medical, financial, or any other form of professional advice.
The Shasta daisy is named after Mount Shasta in California, where it was first developed in the 1900s by horticulturist Luther Burbank.
Shasta daisies thrive in full sun and well-drained soil, ideally in USDA hardiness zones 4 to 9.
Shasta daisies are perennial plants, meaning they can live and bloom for several years, typically 3 to 5 years before needing division.