The Ultimate Guide to Growing Microgreens Indoors
Microgreens are becoming increasingly popular among chefs across the country, urban farmers, and home gardeners. They have attracted people worldwide because of their flavor, appearance, and health advantages. Although small in size, they contain all the essential vitamins, minerals, and antioxidants.
- What: Microgreens are young vegetable greens harvested just after the first leaves develop.
- Best Varieties: Popular choices include sunflower, radish, broccoli, and pea shoots.
- Growing Time: Typically ready to harvest within 7–21 days.
- Benefits: Packed with nutrients, easy to grow, and perfect for small spaces.
- Requirements: Shallow trays, quality seeds, light, water, and a good growing medium.
- Tip: Ensure even watering and adequate light for optimal growth.
Microgreens are a superfood that helps improve the immune system. They don’t need a large garden or enough space to grow. Homeowners can grow them in their lawns or gardens. Microgreen seeds are available both online and in the marketplace. However, various microgreens require different care, and finding correct information in one place can be difficult.
Growcycle offers homeowners top-notch microgreen seeds, ensuring lush and vibrant microgreens indoors. This article will explore all the essential information about microgreens, including seeds, trays, and application tips.
What are Microgreens?
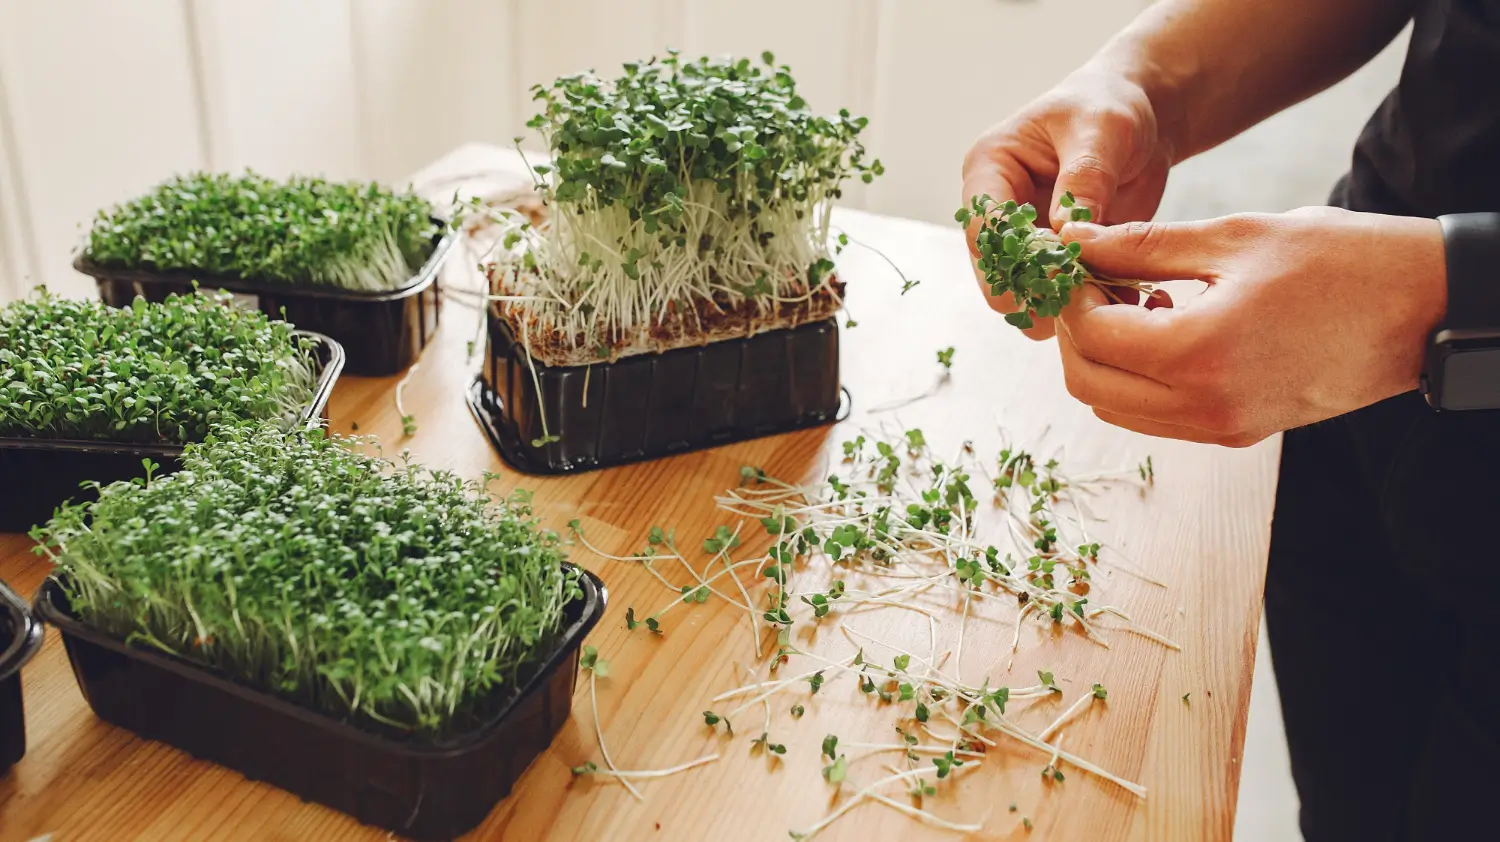
Microgreens are immature plants with edible leaves and branches. Instead of waiting for a seed to develop into a fully grown plant, gardeners can harvest microgreens as seedlings relatively quickly, typically between 7 to 21 days of germination. This quick-growing cycle always makes it possible to have fresh greens, adding vital nutrients and tastes to the diet. There are various ways to grow microgreens indoors to save energy and space.
Microgreen cultivation is an easy and accessible activity ideal for indoor gardening all year round, even in small places. It is easy to incorporate microgreens into meals as they can improve a basic salad, give sandwiches texture and taste, or increase the nutritious value of smoothies and other foods. Additionally, homeowners can avoid the weeds and bugs from a conventional outdoor garden by keeping the microgreens indoors.
Microgreens are an excellent addition to any kitchen because of their remarkable nutrient content, ease of cultivation, and numerous culinary applications. They provide a taste of gardening success and dietary enhancement with little work.
Types of Microgreens
There are many types of microgreens, each with unique flavors, colors, and health benefits. Here are some common types:
1. Leafy Greens and Herbs
- Kale: Mild flavor and rich in nutrients.
- Spinach: Tender leaves with a slightly sweet taste.
- Cilantro: Bold, citrus-like flavor.
- Basil: Sweet and aromatic, great for Italian dishes.
- Parsley: Fresh and slightly bitter taste.
2. Brassicas (Mustard Family)
- Broccoli: Mildly spicy and high in vitamins.
- Cabbage: Crisp texture with a peppery kick.
- Radish: Spicy and crunchy, adds heat to dishes.
3. Pea and Bean Shoots
- Pea Shoots: Sweet, crunchy, and great for salads.
- Lentil Sprouts: Nutty flavor and rich in protein.
4. Grasses and Cereal Crops
- Wheatgrass: Known for its detoxifying properties.
- Barley Grass: Mild and packed with nutrients.
5. Specialty Microgreens
- Sunflower Shoots: Crunchy with a nutty flavor.
- Amaranth: Bright red color and earthy taste.
Benefits of Growing Microgreens Indoors
Growing microgreens indoors offers several benefits, making it a popular choice for home gardeners. Here are some key advantages:
Saves Space
Microgreens don’t need much room to grow. They can easily fit on a windowsill, kitchen counter, or shelf. This makes them perfect for people who live in apartments or small homes without outdoor gardens. Even those with limited space can grow fresh greens indoors.
Grow Anytime of the Year
Unlike outdoor gardening, indoor microgreens can be grown in any season. With the right care, they can thrive indoors in the middle of summer or the cold of winter. A small investment in a grow light can ensure they receive enough light to grow healthy and strong all year round.
Fast Results
Microgreens are one of the quickest crops to grow. They are usually ready to eat within 7 to 21 days. This means people can enjoy fresh, homegrown greens in just a few weeks after planting. The short growing time also makes it satisfying for beginners to see quick success.
Packed with Nutrients
Even though microgreens are small, they are full of important nutrients like vitamins, minerals, and antioxidants. Growing them at home ensures they are fresh, which helps keep all these nutrients intact. This makes them a healthy addition to meals.
Saves Money
Buying microgreens from stores can be expensive because they are often considered premium products. Growing them at home is a much cheaper option. A small pack of seeds can produce multiple harvests, saving money in the long run.
Easy to Grow
Microgreens are beginner-friendly and don’t require much experience to grow successfully. They only need simple supplies, such as trays, soil or a growing medium, seeds, water, and light. They also don’t take up much time, making them a low-effort option for anyone who wants to start gardening.
Reduces Food Waste
When microgreens are grown at home, they can be harvested in small amounts as needed. This reduces the risk of buying too much and letting it spoil. Unlike store-bought greens, there’s no need to worry about wasting leftovers.
Better Indoor Air
Growing plants indoors, including microgreens, helps improve air quality. Plants can filter harmful substances from the air and increase oxygen levels, making the home feel fresher and more comfortable.
Top Microgreens Seeds and Trays for Indoors
Microgreen is an ever-growing indoor gardening plant worldwide. Homeowners can buy some top microgreen seeds to make their homes green.
1. Daikon Radish Microgreens
Daikon radish microgreens are a great option for anyone wanting to grow quick and easy microgreens. These microgreens are simple to grow and can be harvested just 5 to 6 days after planting, making them perfect for gardeners who don’t like to wait. Their crisp white stems and bright green leaves also make them a beautiful addition to any garden.
Daikon radish microgreens have a bold, spicy flavor with tangy and floral notes. However, as they grow bigger and develop more leaves, they lose their crisp texture. Harvesting them early is best for the best taste and texture.
Growing these microgreens is easy. The seeds can be scattered using a broadcast spreader and don’t need strong light to thrive. Bottom heat can help the seeds sprout more quickly. To ensure healthy growth, gardeners should water them from the bottom and rotate the container regularly for even growth.
2. Early Wonder Green Top Beet Seed Microgreens
Early Wonder Top Beet Seeds are the best choice for anyone looking to add pop, color, and flavor to dishes. Their green leaves and red stems are visually appealing, giving a sweet beet taste with a slight bitterness. These microgreens grow as fresh sprouts, making them a delicious and versatile addition to salads.
Growing this microgreen is simple. Homeowners can simply broadcast their seeds in the container and place them under the light to enjoy the fruit all year round. If a gardener is planting beet seeds in a cold environment, it’s recommended to give them bottom heat to ensure quick growth.
Moreover, maintaining soil moisture is also essential to ensure healthy root development. The ideal temperature to grow beet seed is 60–75°F. Thus, its vibrant colors make it the best investment for anyone looking to elevate their home greenery.
3. Arugula Microgreens
Arugula microgreens are the best choice for anyone looking to add a delightful touch to any kitchen. Their bold, peppery flavor improves culinary creations. In addition to flavor, they are packed with essential vitamins like A, B, and C. Moreover, Arugula contains 25% protein, making it a nutrient-rich option for diet-conscious people. It is perfect for salads, sandwiches, and garnishes, adding taste and nutrition.
Arugula is easy to plant, so that beginners can grow it without hesitation. Broadcasting is one of the best methods for increasing arugula. However, keeping the soil moist and heated is essential to accelerate germination. Harvesting arugula is very simple; homeowners must wait until the second set of leaves appears. Thus, growing arugula is an excellent step towards a healthy garden.
4. Microgreens Bull's Blood Beet Seed
Bull’s Blood beet seed microgreens are a great addition to any kitchen. These microgreens have a striking red-purple color, making meals and salads more vibrant. Their sweet taste and crunch make them perfect for salads, sandwiches, garnishes, and more. They are also high in vitamin C and antioxidants, which support the immune system and overall health.
Growing Bull’s Blood beet microgreens is similar to growing other types of microgreens. While they don’t need light to germinate, bright light is important for sprouting. Watering from the bottom and providing warmth helps with germination and healthy growth. When the second leaf appears, they are ready to harvest. Simply cut them at the base of the stem using a sharp knife or scissors.
5. SunBlaster 1020 Microgreen Tray
The SunBlaster Microgreen Tray is an excellent option for growing microgreens at home. It provides a strong base for producing fresh, healthy microgreens. The tray has shallow germination sections, making it easy to use and allowing growers to cut microgreens neatly at the base. This creates a professional look, making the microgreens suitable for selling.
One of the best features of the SunBlaster Microgreen Tray is its compatibility. It fits perfectly inside standard 10x20 double-thick and quad-thick trays, almost as if they were designed to go together. This secure fit is important for handling delicate seedlings. The tray's 10x20-inch size is ideal for most microgreen setups, making it a reliable choice for home or commercial use.
Essential Items for Growing Microgreens Indoors
To grow microgreens in indoor gardens, one must have the following items:
- Seeds: The seeds that form the base of the microgreen garden can be chosen from various culinary herbs and vegetables renowned for their intense flavors and healthful properties. Sweet peas, peppery arugula, aromatic basil, and kale are famous for their vitamin-rich leaves. These types add a multitude of nutrients to the meals in addition to a range of flavors.
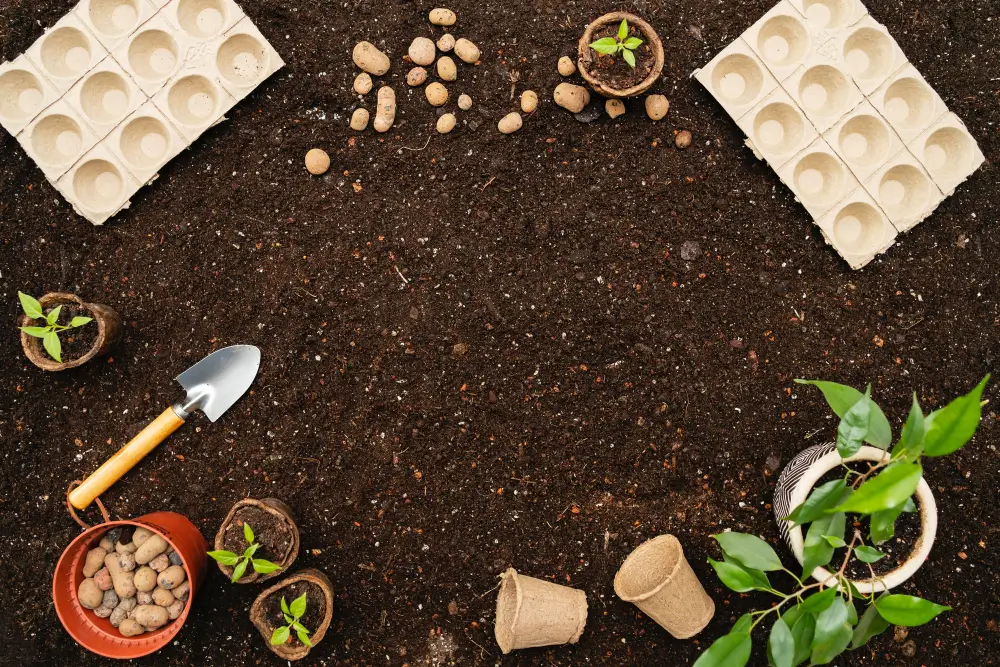
- Growing Medium: Use organic soil or potting mix as the growing medium. The perfect growing medium should contain chemicals and pesticides to ensure the microgreens grow in a secure, nutrient-rich environment.
- Trays: Microgreens have short roots and require little soil, so shallow trays are ideal. These provide the young greens ample room to sprout without the added bulk of deeper containers.
- Source of Light: Adequate lighting is essential for developing robust, vivid microgreens. A grow light is excellent for providing year-round growing conditions. However, if a homeowner prefers a more natural approach, placing the trays in a bright location where they absorb natural sunshine will promote healthy development.
- Water Supplies: Microgreens should be watered to keep the soil moist but not soggy. A spray bottle is ideal; it gently sprinkles the soil surface without harming the fragile seeds or growing roots.
How to Grow Microgreens in Indoors?
Here is a step-by-step guide to growing microgreens efficiently in indoor gardens:
1. Prepare the Growing Medium and Equipment
To start growing microgreens, homeowners should fill the trays with a damp organic potting mix until the top is level and slightly below the soil line. This method creates a tiny, mini vertical farming system for small settings. It allows for effective use of space while encouraging healthy root development and easy access to light and air for soon-to-be sprouted greens.
2. Sow the Seeds
When planting the microgreen seeds, ensure they are uniformly spaced over the soil's surface. For other types, like broccoli and radishes, the seeds don't need to be buried deep in the ground. A gentle press ensures every seed touches the wet potting mix. This technique guarantees the best germination and growth because most microgreens may grow with little soil covering, making it easier to get air and light.
3. Cover and Water the Seed
After planting, gently wrap the seeds in a moist paper towel to help retain the steady moisture needed for germination. Lightly spritz them with a spray bottle to keep the paper towel and soil underneath sufficiently moist without becoming overly saturated. This technique promotes the even and healthy growth of the microgreens by keeping the soil from drying up and ensuring that the seeds have the best conditions for sprouting.
4. Leave Some Light
Once the seeds have sprouted, now it is time to expose them to light. Remove the damp paper towel and place the trays under a grow lamp or in direct sunshine. This stage is critical to growth because light exposure stimulates microgreens to create strong, robust stems and vivid leaves. Ensuring the sprouts get enough light is vital to growing them from tiny seeds to lush, delicious greens ready for harvest.
5. Right Harvesting Time
The microgreens will be ready for harvest in around two weeks. The sprouts are ready to be picked when they are two to three inches tall and have their leaves visible. Pick up a pair of scissors and cut off only the greens that were intended to be utilized just above the soil line. While letting the remaining microgreens grow undisturbed, this technique guarantees the freshest flavor and maximum nutrient value.

Unlocking the secrets to healthy garden soil: Tips and techniques for a thriving garden
By investing time and effort into understanding and improving garden soil, gardeners can set the stage for a better garden. Growcycle sells many soil nutrients, tools, and other things to improve gardening.
LEARN MORE →How to Add Microgreens to Diet?
Adding microgreens to the diet is easy and can boost the meals with fresh, nutritious flavors. Here are some simple ways to incorporate them:
- Salads: The sweet aromas and structure of microgreens such as arugula, red cabbage, and pea shoots may elevate an average salad to a gourmet dish. They also add a robust vitamin profile that includes Vitamin C, Vitamin E, and beta-carotene. Therefore, homeowners can use microgreens as salads.
- Smoothies: Homeowners can add a handful of radish or kale microgreens to the morning smoothie for a packed nutritional boost. These greens boost the smoothie's vivid color and crisp flavor, increasing its nutritional value, especially its calcium, iron, and vitamin K levels.
- Wraps and Smoothies: In addition to salads and smoothies, homeowners can use microgreens in wraps and sandwiches. Microgreens such as basil, mustard, or broccoli can add diverse aromas to a simple sandwich while providing essential nutrients such as folate and magnesium.
- Garnish: Besides their aesthetic appeal, microgreens can be used as a garnish to provide a concentrated amount of nutrients to the dish. Homeowners can sprinkle some edible greens over soups, pizzas, omelets, or any main dish to add visual appeal while increasing vitamin and mineral content.
Additional Tips for Quick and Fast Growth of Microgreens
Here are some additional tips to ensure quick and fast growth of microgreens.
- Moist the soil: Keeping the soil wet is essential for the healthy and fast growth of microgreens. Gardeners should frequently water the microgreens to ensure long-term moisture.
- Sufficient Light: Although microgreens don’t need excessive light, placing their pots near the window or using grow light is essential for quick growth.
- Regular Harvesting: Regular harvesting is the key to the enormous growth of microgreens. The more harvesting, the higher the microgreen yield.
- Grow Different Microgreens: Do not be scared to experiment with different microgreens. Each type provides distinct flavors and nutrients.
FAQs
Do microgreens regrow after cutting?
Microgreens are rarely regrown after the initial harvest. The only microgreens that can regrow are peas, and gardeners can only regrow them once. Therefore, for a continuous supply of microgreens, grow them frequently instead of relying on regrowth after cutting.
What is the secret to growing microgreens?
The secret to growing microgreens is to use high-quality seeds, nutrient-rich growing medium, and regular care. Moreover, optimal light, water, and good airflow are essential to grow microgreens faster.
Can you grow microgreens from regular seeds?
Yes, you can grow microgreens from regular seeds. Although microgreens are immature plants, you can still grow them from regular seeds and harvest them just after the appearance of the first leaf. However, choosing the right and specific type of microgreen, depending on the garden’s need, is the key to healthy yield.
The Bottom Line
Microgreens are not just a cooking trend but also a great way to improve diet, add flavor to food, and start gardening. Whether a homeowner wants microgreens for cooking or to add more greenery to the garden, they are a great choice.
The key to a healthy garden is choosing the right type of microgreens and planting them properly. Growcycle offers a variety of microgreens, including red acre cabbage, to beautify gardens or tasty dishes. Homeowners can buy microgreens from this marketplace to fill their lawns with evergreen plants.
- Sciencedirect - Microgreens (an overview)
- National Library of Medicine - A Comprehensive Review of Bioactive Molecules and Health Benefits
Disclaimer: This material is for informational purposes only and should not be relied on for legal, medical, financial, or other professional advice.


